Gel Nail Strip
Application Guide

Everything you need to know when applying your Gelly wraps.

Gel Nail Strip Application Guide

Your step-by-step path to gorgeous, long-lasting nails—no salon required.

To help you get the best results, we’ve broken the guide into bite-sized sections you can easily jump between:

  • Essentials - What you need before you start
  • Prepare - Nail prep tips that make all the difference.
  • Apply - Our foolproof method for smooth, lasting application.
  • Customize - Add-ons, top coats, and creative styling options.
  • Aftercare - Tips to keep your mani looking flawless for longer.

Just follow the steps—and enjoy a perfect set of Gelly nails every time.

Need more help? Check out our FAQ Section for answers to common questions, or head to Removal Guide when it’s time for a fresh set.

Gather Your Essentials

Before you begin, ensure you have everything you need to achieve that flawless finish—no dedicated setup required. With Gelly, convenience is built right into your kit. Here's what you'll need:

Gelly Premium Gel Nail Strips

The foundation of your at-home nail masterpiece! Your gel nail strips are stored safely inside a black, protective UV pouch in your Gelly box.

Nail File

Use it to shape your nails to perfection. A disposable mini nail file is included in each box of Gelly nail strips.

Nail Cutting Tool

For adjusting or trimming the gel strips to your nail shape, consider using a precision nail scissor or a dedicated nail clipper.

Cuticle Stick

Use this to gently push back your cuticles and clean the nail plate for better adhesion. If you don’t have a cuticle pusher, you can use the wooden stick included in your Gelly box.

UV Lamp

Crucial for curing your gel strips, this tool sets your look with a durable, high-shine finish.

Clean Hands

Ensure you have access to water, a gentle handwashing soap, and a soft towel to clean and dry your hand before we start.

Now that we have everything set, we’re ready to start applying those beautiful Gelly wraps

Common Questions

Not at all! Unlike traditional stick-on nails, which are thick plastic press-ons that sit on top of your nail, Gelly's semi-cured gel nail strips wrap seamlessly onto your natural nail for a flexible, salon-quality fit. Once cured under a UV lamp, they harden into a true gel manicure—offering a thinner, more natural feel with a glossy, long-lasting finish. No bulky plastic, just a perfect, professional look.

With proper application and care, Gelly strips can last for 14 days, depending on how fast your nails grow. Some users even get up tp 3 weeks of wear when using our top coat. Like all nail treatments, factors like nail prep, daily activities, and top coat usage all affect longevity.

No. Gelly semi-cured gel strips are designed to adhere perfectly to your natural nail without a base coat. Using one may actually interfere with adhesion. Just follow our prep steps, and you're good to go!

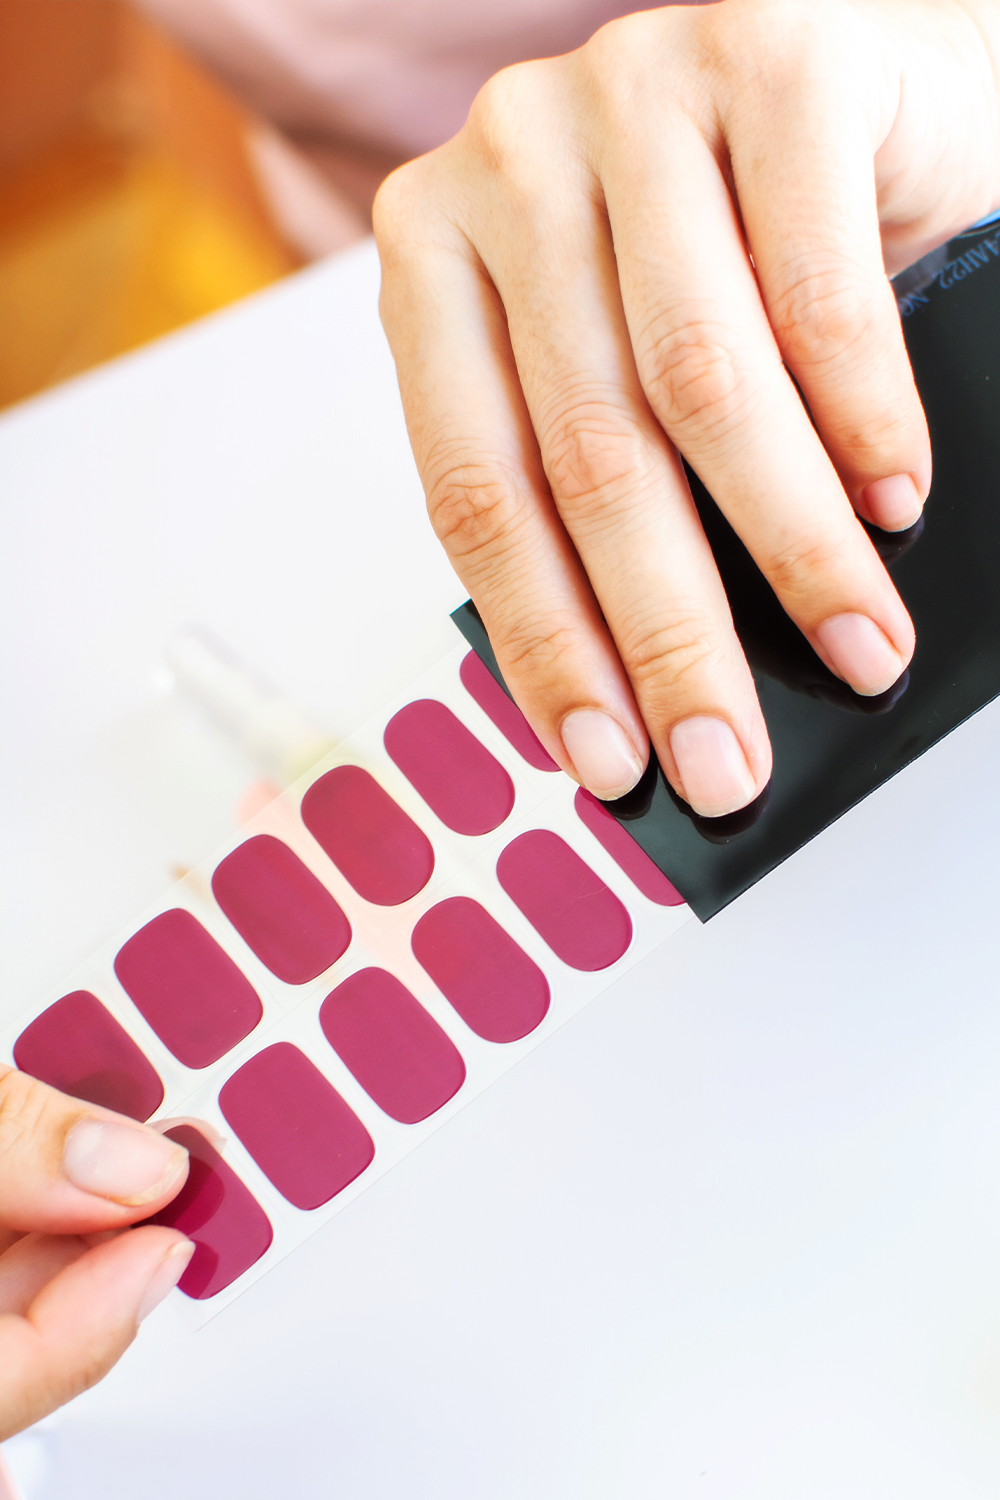
You don’t need a top coat for your Gelly strips—our semi-cured gel strips are designed to give you that flawless, salon-quality finish straight out of the box. They’re already packed with shine, durability, and that perfect gel-like feel, no extra steps required.

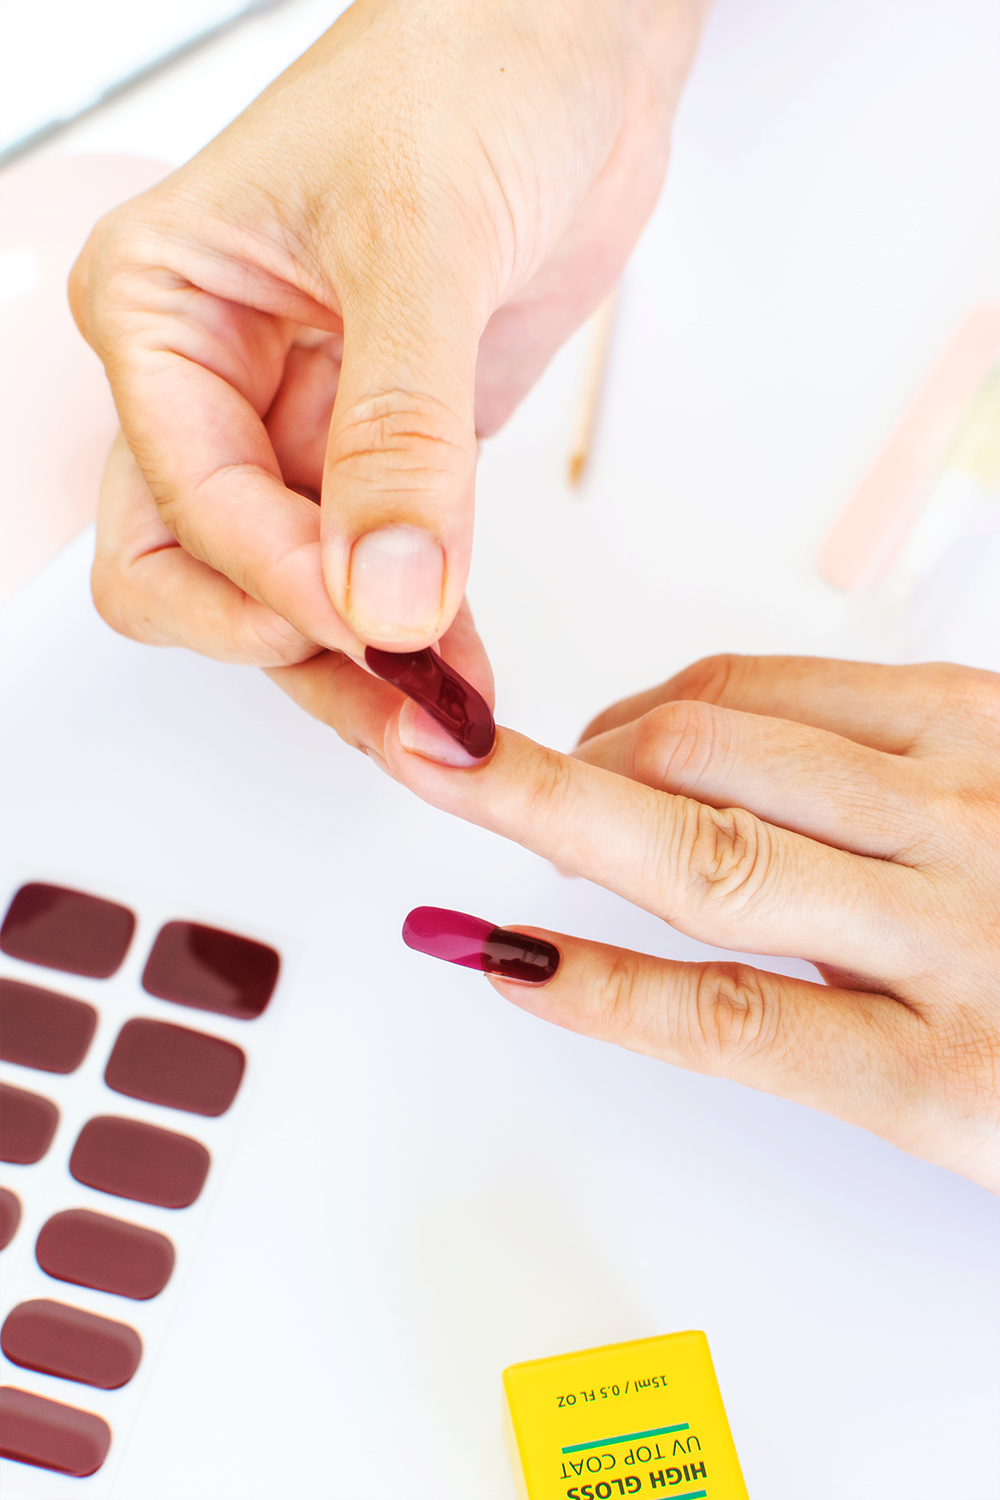
That said, there are a few reasons you might want to add a top coat. If your daily routine is tough on your nails—think constant typing, frequent handwashing, etc. — a top coat can help reinforce the edges and keep your mani looking fresher for longer. If you plan on styling your gel nails with extra customization, like nail art, embellishments, or layered designs, a top coat is going to be essential since it helps lock everything in place. And of course, if you just can’t resist that ultra-glossy, next-level shine, our high-gloss top coat is the perfect way to amp up the look.

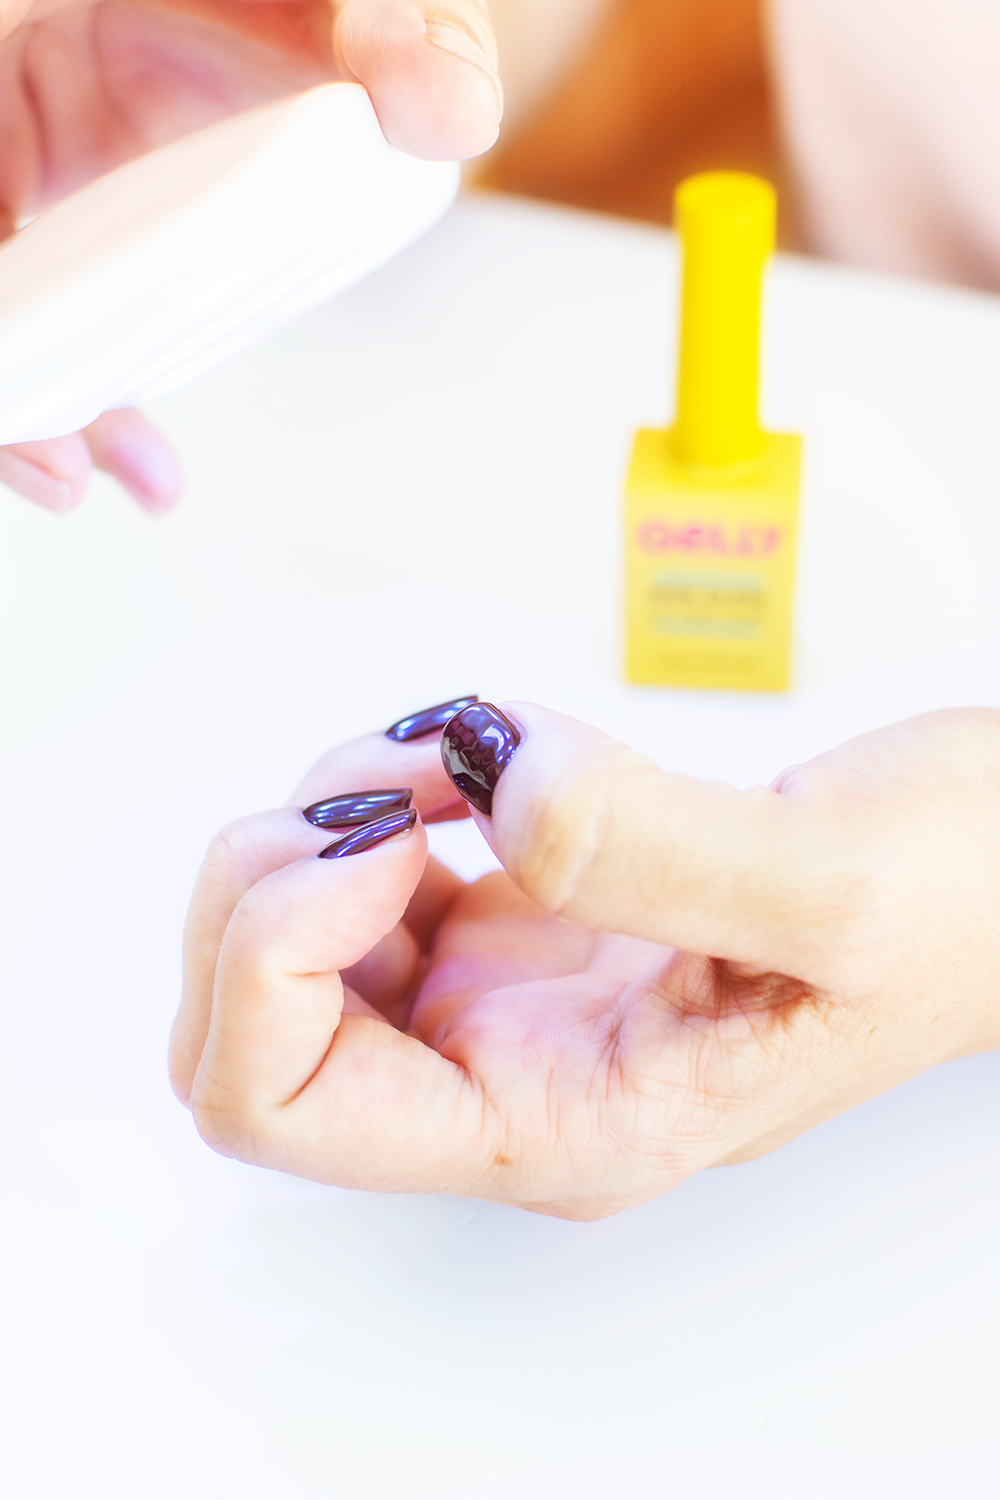
That’s why we released our Gelly high-gloss top coat—designed to give your nails that extra protection, extra shine, and extra wow factor, all while keeping them lightweight and flexible.

Preparation

A great manicure starts with properly prepped nails. Whether you're using gel polish or gel strips, a clean, dry nail surface is essential for long-lasting wear. Oils, dirt, or moisture can interfere with adhesion, causing lifting or peeling over time.

Start by washing your hands thoroughly with warm water and a mild soap, focusing on your nails to remove any natural oils or residue. Once they’re completely dry, carefully push back your cuticles using the wooden cuticle stick or a cuticle pusher. Make sure to remove any dead skin along the nail plate. This step is key—any leftover cuticle or dry skin can create a barrier that prevents the gel strip from fully adhering.

To finish, swipe each nail with an alcohol-based cleanser (included in your kit) or a nail dehydrator. This crucial step evaporates any lingering moisture and removes the last traces of oil, creating the perfect base for your Gelly strips to bond securely. With your nails clean, dry, and prepped, you’re ready to start applying!

Common Questions

Alcohol and dehydrators work by removing excess moisture and natural oils from your nail surface, creating a clean slate for better adhesion. For most people, the complementary alcohol pad included in your Gelly box is more than enough to get the job done, ensuring your strips stick securely and last longer.

However, if you feel like your nails are excessively oily or if you’ve struggled with lifting in the past, a dedicated nail dehydrator might be worth considering. It provides an extra level of prep by thoroughly drying out the nail plate, helping your strips grip even better for extended wear.

No, buffing isn’t necessary for your Gelly strips to adhere properly. In fact, skipping this step is better for your nails—buffing can thin the nail plate over time, especially if done frequently. Instead, focus on proper prep by cleaning your nails, pushing back your cuticles, and ensuring there’s no dead skin on the nail plate. This creates the ideal surface for a secure, long-lasting application.

Yes, a scrub can help by removing dead skin and smoothing the nail surface, improving adhesion and creating a cleaner application.

However, avoid scrubs that contain oils, glycerin, or moisturizing butters, as these can leave behind a residue that prevents gel nails—both strips and regular polish—from adhering properly. This is because any lingering oils or moisture create a barrier between the nail and the adhesive, leading to lifting, peeling, or reduced wear time.

Instead, use oil-free salt or sugar-based scrubs, and always wash your hands thoroughly with soap and water afterward. For the best prep, finish by wiping your nails with an alcohol pad (or nail dehydrator, if you're concerned about oily nails) to remove any last traces of moisture.

Applying the Strips

The big moment has arrived—time to wrap those Gelly strips onto your beautiful digits. A match made in manicure heaven! If you're new to the process, don't worry—it’s easier than you think. In just a few simple steps, you’ll have a flawless, salon-quality finish right at your fingertips.

Let’s get started!

Step 1:

Prepping Your Strips

Before applying your semi-cured gel strips, it's important to get them ready properly. Start by selecting the right size strip for each nail. Hold a strip over your nail to compare its width—choose the one that best matches without extending past the edges. If you're between sizes, opt for the smaller one to prevent lifting.

Once you've found the right fit, carefully peel the strip from its backing using tweezers or clean hands. Be gentle and avoid touching the adhesive side too much, as this helps maintain its stickiness and ensures better adhesion to your nail.

To find out more about the various gel strips sizes included in each of Gelly's mani or pedi gel nails have a look at our gel strip size guide.

Step 2

Aligning for the Perfect Fit

Precision is key to achieving a flawless, professional-looking application. Begin by placing the strip just above your cuticle with no overlap onto the cuticle. This creates a natural, seamless look while preventing lifting as your nails grow.

You can gently peel and reposition the strip until you get it spot on.

Step 3

Pressing Like a Pro

Now it’s time to secure the strips for a long-lasting, smooth finish. Using a gentle rolling motion, press from the center of the strip outward toward the edges with your fingertip or a soft tool. This helps ensure even adhesion while keeping the strip’s surface smooth.

Next, press firmly across the entire strip to eliminate any air bubbles, paying extra attention to the edges where lifting is most likely to occur.

Step 4

Trimming the Excess Gel

After firmly pressing the strip, take a precision nail scissor or a sharp nail clipper to trim any overhanging gel that extends beyond your natural nail tip. Hold your finger steady and, using small, controlled snips, carefully remove the extra material.

Aim for a smooth, even cut that follows the natural curve of your nail. To prevent lifting, avoid pulling the gel down along the ridge of your finger when cutting, as this can cause the gel to recoil slightly after the cut. Instead, make sure the strip is securely pressed and simply trim along the edge for a clean, seamless finish.

Step 5

Curing for Long-Lasting Wear

The final step locks in your manicure for a flawless, chip-resistant finish. Place your hands under a UV or LED lamp and cure each nail for the recommended time, typically around 60 to 90 seconds. This process hardens the gel, making your strips fully set and durable.

If there’s any excess material hanging past the tip of your nail, use the nail file included in your box to gently file it away, creating a clean and polished look.

Proper curing is essential for maximizing wear time and preventing premature chipping.

After curing, check for any edges that may need extra reinforcement. If you notice slight lifting, press them down firmly and spot-cure individual nails for an additional 5 to 10 seconds to ensure a secure, long-lasting bond. This quick step helps prevent premature lifting and keeps your manicure looking flawless for longer.

But why stop there? Customization is where the real fun begins. In the next section, we’ll show you how to tailor your mani to perfection, giving you a truly personalized, salon-quality finish—right at home.

Let’s get into it!

Common Questions

Nope! Our Gelly semi-cured gel strips are designed to adhere perfectly to your natural nail without a base coat. In fact, using one may interfere with adhesion. Just follow our prep steps, and you're good to go!

As long as the strip hasn't been cured, you can adjust it by carefully peeling it off and repositioning it. Unfortunately, if your gel strips have already been cured under the UV light, the gel has fully hardened and repositioning won't be possible. Fortunately, both our mani and pedi gel strips come with extra strips, so you'll have plenty of backups if needed.

Absolutely! For the best results, we recommend filing after curing, as the strips will be fully set and easier to shape. Use a fine-grit nail file (a disposable one is included in your Gelly box) and file around the nail to ensure a smooth, seamless edge.

Our gel nail strips are designed to be applied directly onto your natural nails for a salon-quality gel manicure. They don’t function as traditional extensions, but you can apply them over builder gel or nail extensions if you prefer longer nails.

Yes. Just make sure to seal them in their original black UV protection pouch and store them in a cool, dark place. Exposure to light can cause them to start curing before you're ready to use them. When stored correctly, your gel nail strips can stay fresh for up to 12 months.

Customization & Enhancement

Now that your Gelly strips are applied and cured, it's time to refine and personalize your manicure. Whether you prefer a sleek, polished look or want to experiment with bold designs, a few simple enhancements can take your nails to the next level.

For a more tailored fit, use a fine-grit nail file after curing. Shape your nails into an oval, almond, square, or coffin style. Filing in one direction prevents lifting and helps maintain a smooth, professional finish.

Our Gelly High Gloss UV Top Coat adds both shine and durability. It reinforces the edges of your gel strips, helping to prevent lifting—especially if your hands are frequently exposed to water. Apply a thin, even layer and cure it under a UV lamp for 60 to 90 seconds. Make sure the polish does not touch your skin or cuticles.

If you enjoy creative nail designs, adding embellishments like our 3D or ultra-thin nail art stickers is an easy way to customize your look. You can also mix and match strip patterns, use accent nails, or try ombré and French tip effects. They are easy to apply and remove as you wish, and as an optional extra can be secured with a top coat.

Aftercare & Removal

Your Gelly nails are designed to be long-lasting, but taking care of your nails post-application ensures they stay strong, healthy, and looking flawless. Proper aftercare not only extends the life of your gel strips but also keeps your natural nails in top condition.

Keep Your Nails Hydrated

Just like your skin, your nails need hydration. Regularly applying cuticle oil helps maintain flexibility, prevents brittleness, and keeps your nails nourished. For best results, massage a drop of cuticle oil into the base of each nail daily—this simple step keeps your nails healthy beneath your Gelly strips.

A Gentle Removal

When it’s time for a refresh, removing your Gelly strips is as gentle as the application process. The strips have a strong adhesion to your natural nails can should not be peeled off as is, as this can cause stress to the natural nail. Instead, use our recommended oil removal method for a damage-free removal. We’ve put together a detailed step-by-step removal guide to help you safely and easily remove your gel strips—check it out here.

Protecting Your Nails

While Gelly strips are durable, treating your nails with care ensures they stay intact for as long as possible. Wearing gloves when doing household tasks like washing dishes or gardening helps prevent unnecessary lifting.

Common Questions

Our Gelly strips are designed for extended wear—typically lasting at least 14 days with proper care—but you’re free to switch designs as often as you like. As with any nail treatment, we do recommend giving your natural nails a short break between applications (just a few days) to keep them healthy and strong.

Our gel nail strips are designed to stay put, but when it’s time for a change, removal is just as easy—without damaging your nails. Instead of peeling them off, apply cuticle oil around the edges then use the wooden cuticle stick (included with your Gelly strips) to gently lift the strip, allowing the oil to seep in underneath the strip and dissolve the adhesive. If it resists, repeat the process by re-applying oil and gently working it in underneath the sticker until it comes free rather than forcing it.

If you’re using cuticle oil, a bristle applicator makes all the difference—it helps work the oil underneath the nail strip for an easier, damage-free lift. Our Gelly Cuticle Oil comes with a precision bristle tip, so you can target the edges effortlessly.

For more information, please check out our Removal Guide.

Once you’ve cured your nails under a UV, your manicure is immediately ready for daily use. However, we advise avoiding exposure to lotions, water or chemicals for the first hour to ensure optimal adhesion and durability.

Need help?

Your FAQs,
answered

View FAQs
High Gloss

UV Top Coat

View Now